Whether you want to mark the editing status, important documents, or confidential matters, or perhaps you want to add your own company logo - with Word you have the option of using a large selection of pre-made watermarks. If this is not enough for you, you can insert your own watermarks. This allows you to create messages that are easy to understand for your employees and a simple recognition feature for your customers.
Watermarks in Word
- Under the "Design" tab you will find an icon for "Watermark".

- There are templates for watermarks, such as "Urgent", "Example" and "Draft". When you click them, they will be applied directly to your document.
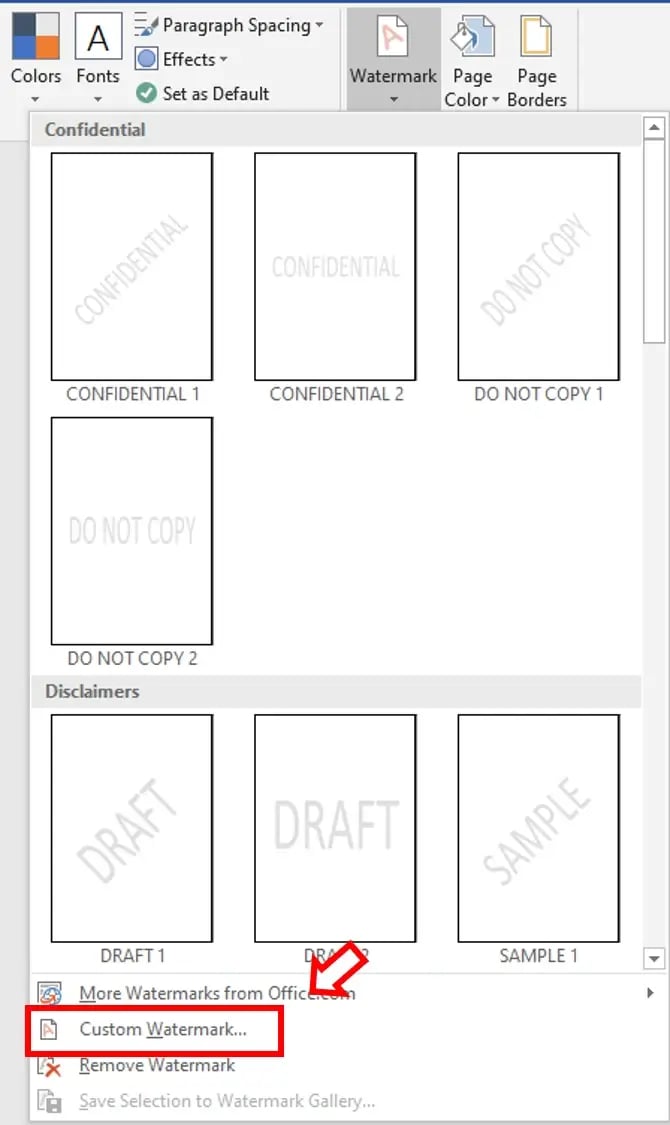
- However, if you want to insert your company's name or logo as a watermark, for example, select "Custom Watermarks".
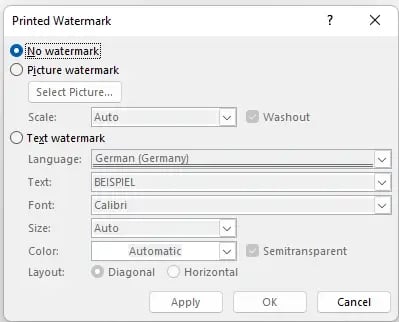
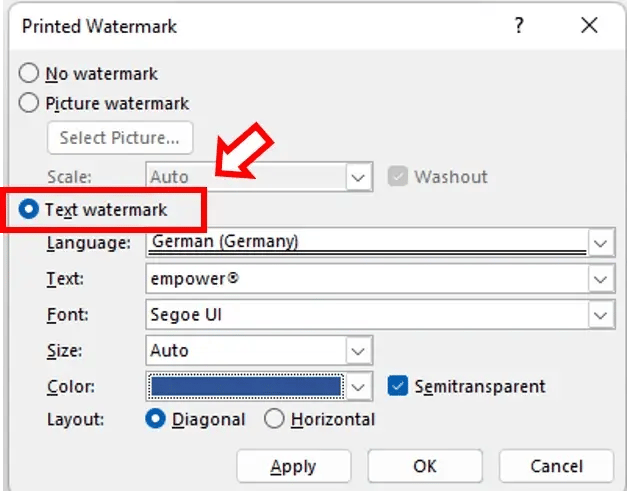
- If you want to insert the name of your company as a watermark, click the circle next to "Text watermark". Now you can enter your company name in "Text", choose the font and decide on a different color. You can also choose whether your watermark should stretch across the document diagonally or horizontally.
- Now, by clicking "OK", the watermark will appear on every page of your document.

- If you want to use your company logo as a watermark, select "Picture watermark" instead of "Text watermark".
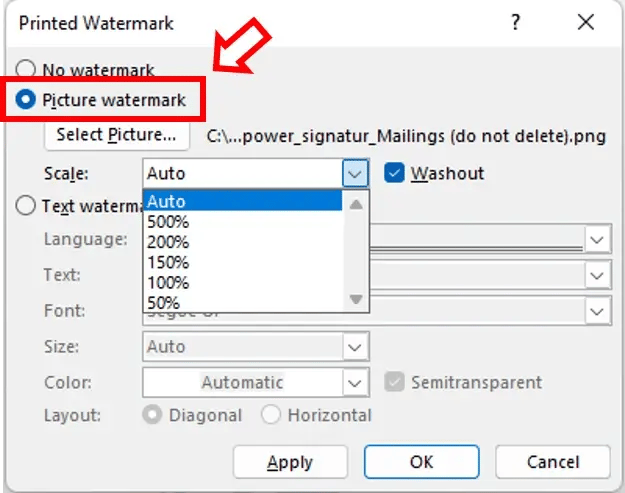
- Click "Select Picture..." and upload the corresponding graphic of the logo.

And just like that, you have used your company logo as a watermark in your document.
Watermarks in PowerPoint
In PowerPoint, there is no predefined watermark feature as in Word. However, marking your presentations with an appropriate tag is still possible.
- Go to the "View" tab and click "Slide Master".

- Right-click on your slide and select "Format Background".

- Now select "Picture or texture fill".
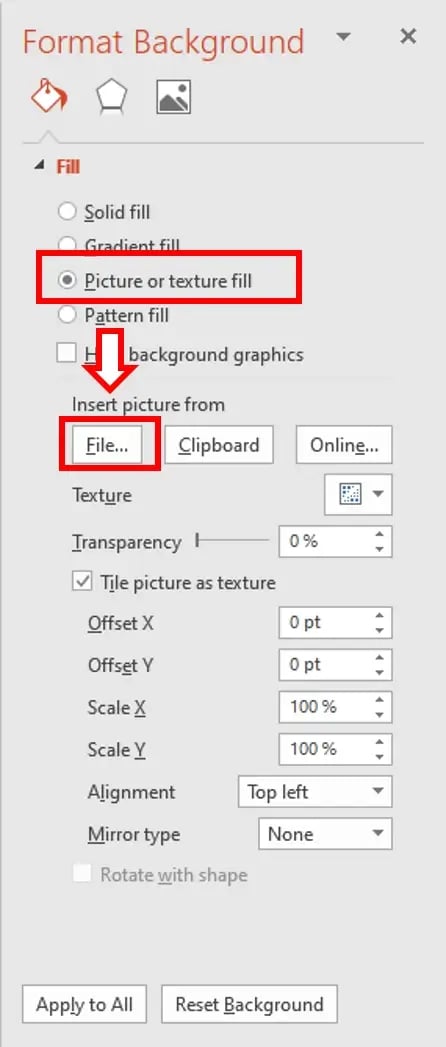
- Click on "File" to load the graphic of your company logo into the presentation.
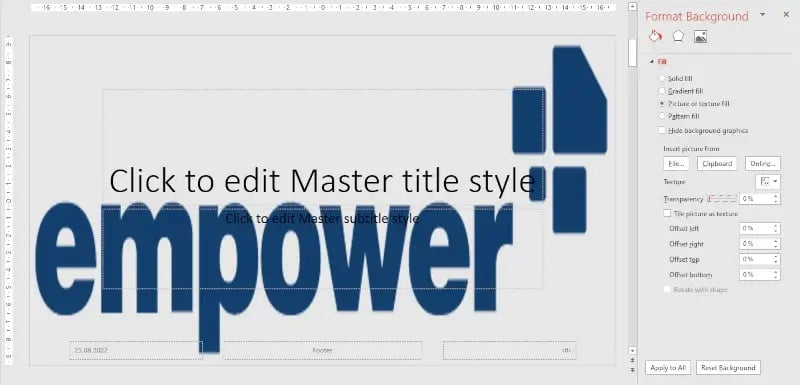
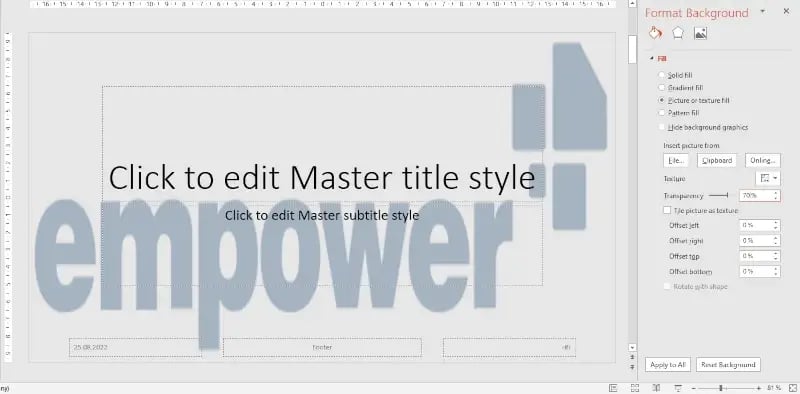
- Now you can continue editing the image. It is recommended to move the transparency slider up so that you can read the text in front of your logo properly.
- If you click "Arrange image side by side as texture", the following will happen:

- Lastly, click "Apply to All" to set the watermark as the background for each slide in your presentation.
We hope our guide to creating watermarks in Microsoft Office will help you protect your documents!


How to merge documents in Word

How to easily compare two Word documents